Smart contracts integration with Nethereum
The purpose of this sample is the following:
-
Understanding how to create contract deployment, function and event definitions to interact with a smart contract
-
Creating an account object using a private key, allowing to sign transactions “offline”.
-
Deploying a smart contract (the sample provided is the standard ERC20 token contract)
-
Making a call to a smart contract (in this scenario get the balance of an account)
-
Sending a transaction to the smart contract (in this scenario transferring balance)
-
Estimating the gas cost of a contract transaction
-
Gas Price, Nonces and Sending Ether to smart contracts
-
Signing online / offline transaction function messages and deployment messages
-
Extension methods for Deployment and Function messages
-
Retrieving the state of a smart contract from a previous block
Pre-Conditions
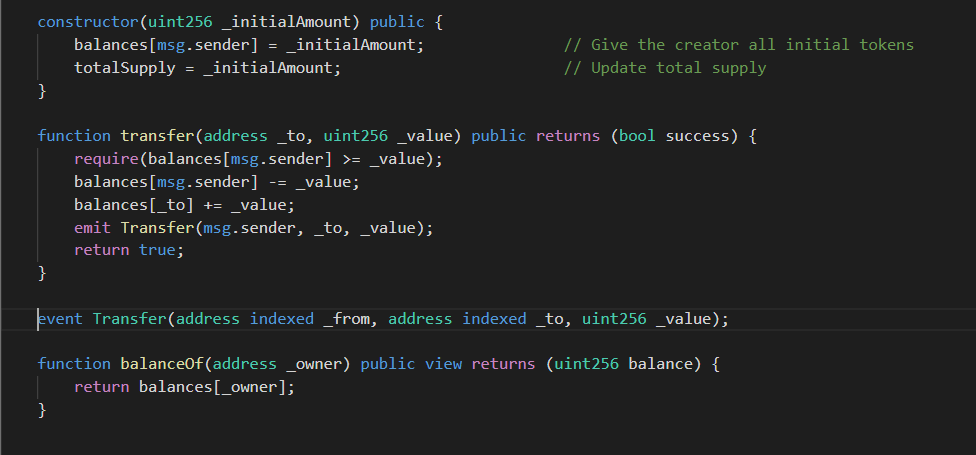
In this tutorial we are going to interact with the ERC20 standard token contract. The smart contract provides a standard way to create a new token, transfer it to another account and query the balance of any account. This standard interface allows the interoperability of smart contracts providing the same signature and applications that integrate with it.
Note
You can execute the code pertaining to this article in Nethereum’s playground: http://playground.nethereum.com/csharp/id/1007
First of all, we need to declare our namespaces, and contract definition to interact with the smart contract. In this scenario we are only interested in the Deployment, Transfer function and BalanceOf Function of the ERC20 smart contract.
using Nethereum.Web3;
using Nethereum.ABI.FunctionEncoding.Attributes;
using Nethereum.Contracts.CQS;
using Nethereum.Util;
using Nethereum.Web3.Accounts;
using Nethereum.Hex.HexConvertors.Extensions;
using Nethereum.Contracts;
using Nethereum.Contracts.Extensions;
using System.Numerics;
To deploy a contract we will create a class inheriting from the ContractDeploymentMessage, here we can include our compiled byte code and other constructor parameters.
As we can see below the StandardToken deployment message includes the compiled bytecode of the ERC20 smart contract and the constructor parameter with the “totalSupply” of tokens.
Each parameter is described with an attribute Parameter, including its name “totalSupply”, type “uint256” and order.
public class StandardTokenDeployment : ContractDeploymentMessage
{

    public static string BYTECODE = "0x60606040526040516020806106f5833981016040528080519060200190919050505b80600160005060003373ffffffffffffffffffffffffffffffffffffffff16815260200190815260200160002060005081905550806000600050819055505b506106868061006f6000396000f360606040523615610074576000357c010000000000000000000000000000000000000000000000000000000090048063095ea7b31461008157806318160ddd146100b657806323b872dd146100d957806370a0823114610117578063a9059cbb14610143578063dd62ed3e1461017857610074565b61007f5b610002565b565b005b6100a060048080359060200190919080359060200190919050506101ad565b6040518082815260200191505060405180910390f35b6100c36004805050610674565b6040518082815260200191505060405180910390f35b6101016004808035906020019091908035906020019091908035906020019091905050610281565b6040518082815260200191505060405180910390f35b61012d600480803590602001909190505061048d565b6040518082815260200191505060405180910390f35b61016260048080359060200190919080359060200190919050506104cb565b6040518082815260200191505060405180910390f35b610197600480803590602001909190803590602001909190505061060b565b6040518082815260200191505060405180910390f35b600081600260005060003373ffffffffffffffffffffffffffffffffffffffff16815260200190815260200160002060005060008573ffffffffffffffffffffffffffffffffffffffff168152602001908152602001600020600050819055508273ffffffffffffffffffffffffffffffffffffffff163373ffffffffffffffffffffffffffffffffffffffff167f8c5be1e5ebec7d5bd14f71427d1e84f3dd0314c0f7b2291e5b200ac8c7c3b925846040518082815260200191505060405180910390a36001905061027b565b92915050565b600081600160005060008673ffffffffffffffffffffffffffffffffffffffff168152602001908152602001600020600050541015801561031b575081600260005060008673ffffffffffffffffffffffffffffffffffffffff16815260200190815260200160002060005060003373ffffffffffffffffffffffffffffffffffffffff1681526020019081526020016000206000505410155b80156103275750600082115b1561047c5781600160005060008573ffffffffffffffffffffffffffffffffffffffff1681526020019081526020016000206000828282505401925050819055508273ffffffffffffffffffffffffffffffffffffffff168473ffffffffffffffffffffffffffffffffffffffff167fddf252ad1be2c89b69c2b068fc378daa952ba7f163c4a11628f55a4df523b3ef846040518082815260200191505060405180910390a381600160005060008673ffffffffffffffffffffffffffffffffffffffff16815260200190815260200160002060008282825054039250508190555081600260005060008673ffffffffffffffffffffffffffffffffffffffff16815260200190815260200160002060005060003373ffffffffffffffffffffffffffffffffffffffff1681526020019081526020016000206000828282505403925050819055506001905061048656610485565b60009050610486565b5b9392505050565b6000600160005060008373ffffffffffffffffffffffffffffffffffffffff1681526020019081526020016000206000505490506104c6565b919050565b600081600160005060003373ffffffffffffffffffffffffffffffffffffffff168152602001908152602001600020600050541015801561050c5750600082115b156105fb5781600160005060003373ffffffffffffffffffffffffffffffffffffffff16815260200190815260200160002060008282825054039250508190555081600160005060008573ffffffffffffffffffffffffffffffffffffffff1681526020019081526020016000206000828282505401925050819055508273ffffffffffffffffffffffffffffffffffffffff163373ffffffffffffffffffffffffffffffffffffffff167fddf252ad1be2c89b69c2b068fc378daa952ba7f163c4a11628f55a4df523b3ef846040518082815260200191505060405180910390a36001905061060556610604565b60009050610605565b5b92915050565b6000600260005060008473ffffffffffffffffffffffffffffffffffffffff16815260200190815260200160002060005060008373ffffffffffffffffffffffffffffffffffffffff16815260200190815260200160002060005054905061066e565b92915050565b60006000600050549050610683565b9056";

    public StandardTokenDeployment() : base(BYTECODE){}

    [Parameter("uint256", "totalSupply")]
    public BigInteger TotalSupply { get; set; }
}
We can call the functions of smart contract to query the state of a smart contract or do any computation, which will not affect the state of the blockchain.
To do so we will need to create a class which inherits from “FunctionMessage”. First we will decorate the class with a “Function” attribute, including the name and return type as you can see in the snippet below.
Each parameter of the function will be a property of the class, each of them decorated with the “Parameter” attribute, including the smart contract name, type and parameter order.
For the ERC20 smart contract, the “balanceOf” function definition, provides the query interface to get the token balance of a given address. As we can see this function includes only one parameter “_owner”, of the type “address”.
[Function("balanceOf", "uint256")]
public class BalanceOfFunction : FunctionMessage
{
    [Parameter("address", "_owner", 1)]
    public string Owner { get; set; }
}
Another type of smart contract function will be correspondent to a transaction that will change the state of the smart contract (or smart contracts).
For example The “transfer” function definition for the ERC20 smart contract, includes the parameters “_to” address parameter as a string, and the “_value” or TokenAmount we want to transfer.
In a similar way to the “balanceOf” function, all the parameters include the solidity type, parameter name and parameter order.
!!! Note: When working with functions, it is very important to have the parameters types, and function name correct as all of these make the signature of the function.
[Function("transfer", "bool")]
public class TransferFunction : FunctionMessage
{
    [Parameter("address", "_to", 1)]
    public string To { get; set; }

    [Parameter("uint256", "_value", 2)]
    public BigInteger TokenAmount { get; set; }
}
Finally smart contracts also have events. Events in smart contracts write the blockchain log, providing a way to retrieve further information of any smart contract interaction occurred.
To create an Event definition, we need to create a class that inherits from IEventDTO, decorated with the Event attribute.
The Transfer Event, similar to the Function it also includes the parameters with the name, order and type. But also a boolean value indicating if the parameter is indexed or not.
Indexed parameters will allow us later on to query the blockchain for those values.
[Event("Transfer")]
public class TransferEventDTO : IEventDTO
{
    [Parameter("address", "_from", 1, true)]
    public string From { get; set; }

    [Parameter("address", "_to", 2, true)]
    public string To { get; set; }

    [Parameter("uint256", "_value", 3, false)]
    public BigInteger Value { get; set; }
}
Instantiating Web3 and the Account
To create an instance of web3 we first provide the url of our testchain and the private key of our account. Here we are using http://testchain.nethereum.com:8545 which is our simple single node Nethereum testchain. When providing an Account instantiated with a private key, all our transactions will be signed by Nethereum.
var url = "http://testchain.nethereum.com:8545";
var privateKey = "0x7580e7fb49df1c861f0050fae31c2224c6aba908e116b8da44ee8cd927b990b0";
var account = new Account(privateKey);
var web3 = new Web3(account, url);
Deploying the Contract
Find an executable sample online on the Nethereum playground .
The next step is to deploy our Standard Token ERC20 smart contract, in this scenario the total supply (number of tokens) is going to be 100,000.
First we create an instance of the StandardTokenDeployment with the TotalSupply amount.
var deploymentMessage = new StandardTokenDeployment
{
    TotalSupply = 100000
};
Then we create a deployment handler using our contract deployment definition and simply deploy the contract using the deployment message. We are auto estimating the gas, getting the latest gas price and nonce so nothing else is set anything on the deployment message.
Finally, we wait for the deployment transaction to be mined, and retrieve the contract address of the new contract from the receipt.
var deploymentHandler = web3.Eth.GetContractDeploymentHandler<StandardTokenDeployment>();
var transactionReceipt = await deploymentHandler.SendRequestAndWaitForReceiptAsync(deploymentMessage);
var contractAddress = transactionReceipt.ContractAddress;
Interacting with the Contract
Once we have deployed the contract, we can start interaction with the contract.
Querying
To retrieve the balance of an address we can create an instance of the BalanceFunction message and set the parameter as our account “Address”, because we are the “owner” of the Token the full balance has been assigned to us.
var balanceOfFunctionMessage = new BalanceOfFunction()
{
    Owner = account.Address,
};

var balanceHandler = web3.Eth.GetContractQueryHandler<BalanceOfFunction>();
var balance = await balanceHandler.QueryAsync<BigInteger>(contractAddress, balanceOfFunctionMessage);
To retrieve the balance, we will create a QueryHandler and finally using our contract address and message retrieve the balance amount.
Multiple return types or complex objects
Functions of smart contracts can return one or multiple values in a single call. To decode the return values, we use a FunctionOutputDTO.
Function outputs are classes which are decorated with a FunctionOutput attribute and implement the interface IFunctionOutputDTO.
An example of this is the following implementation that can be used to return the single value of the Balance on the ERC20 smart contract.
 [FunctionOutput]
 public class BalanceOfOutputDTO : IFunctionOutputDTO
 {
      [Parameter("uint256", "balance", 1)]
      public BigInteger Balance { get; set; }
 }
If we were going to return multiple values we could have something like:
 [FunctionOutput]
 public class BalanceOfOutputMultipleDTO : IFunctionOutputDTO
 {
      [Parameter("uint256", "balance1", 1)]
      public BigInteger Balance1 { get; set; }

      [Parameter("uint256", "balance2", 2)]
      public BigInteger Balance2 { get; set; }

      [Parameter("uint256", "balance1", 3)]
      public BigInteger Balance3 { get; set; }
 }
When querying the chain we will use the following method instead:
var balance = await balanceHandler.QueryDeserializingToObjectAsync<BalanceOfOutputDTO>( balanceOfFunctionMessage, contractAddress);
Querying previous state of the smart contract
Another great feature of the Ethereum blockchain is the capability to retrieve the state of a smart contract from a previous block.
For example, we could get the balance of the owner at the time of deployment by using the block number, in which the contract was deployed.
var balance = await balanceHandler.QueryDeserializingToObjectAsync<BalanceOfOutputDTO>( balanceOfFunctionMessage, contractAddress, new Nethereum.RPC.Eth.DTOs.BlockParameter(transactionReceipt.BlockNumber));
Transfer
Making a transfer will change the state of the blockchain, so in this scenario we will need to create a TransactionHandler using the TransferFunction definition.
In the transfer message, we will include the receiver address “To”, and the “TokenAmount” to transfer.
The final step is to send the request and wait for the receipt to be “mined” and included in the blockchain.
Another option will be not to wait (poll) for the transaction to mined and just retrieve the transaction hash.
var receiverAddress = "0xde0B295669a9FD93d5F28D9Ec85E40f4cb697BAe";
var transferHandler = web3.Eth.GetContractTransactionHandler<TransferFunction>();
var transfer = new TransferFunction()
{
    To = receiverAddress,
    TokenAmount = 100
};
var transactionReceipt = await transferHandler.SendRequestAndWaitForReceiptAsync(contractAddress, transfer);
Transferring Ether to a smart contract
A function or deployment transaction can send Ether to the smart contract. The FunctionMessage and DeploymentMessage have the property “AmountToSend”.
So if the “transfer” function accepts also Ether, we will set it this way.
transfer.AmountToSend = Nethereum.Web3.Web3.Convert.ToWei(1);
The GasPrice is set in “Wei” which is the lowest unit in Ethereum, so in the scenario above we have converted 1 Ether to Wei.
Gas Price
Nethereum sets automatically the GasPrice if not provided by using the clients “GasPrice” call, which provides the average gas price from previous blocks.
If you want to have more control of the GasPrice these can be set in both FunctionMessages and DeploymentMessages.
transfer.GasPrice = Nethereum.Web3.Web3.Convert.ToWei(25, UnitConversion.EthUnit.Gwei);
The GasPrice is set in “Wei” which is the lowest unit in Ethereum, so if we are used to the usual “Gwei” units, this will need to be converted using the Nethereum Convertion utilities.
Estimating Gas
Nethereum does an automatic estimation of the total gas necessary to make the function transaction by calling the “EthEstimateGas” internally with the “CallInput”.
If wanted this can be done manually, using the TransactionHandler and the “transfer” transaction FucntionMessage.
 var estimate = await transferHandler.EstimateGasAsync(contractAddress, transfer);
 transfer.Gas = estimate.Value;
Find an executable sample of the above on the Nethereum playground .
Nonces
Each account transaction has a Nonce associated with it, this is the order and unique number for that transaction. This allows each transaction to be differentiate it from each other, but also ensure transactions are processed on the same order.
Nethereum calculates the Nonce automatically for all Transactions by retrieving the latest count of the transactions from the chain. Also internally manages at Account level an in memory counter on the nonces, to allow for situations in which we want to send multiple transactions before giving time to the Ethereum client to update its internal counter.
Nevertheless there may be scenarios where we want to supply our Nonce, for example if we want to sign the transaction completely offline.
transfer.Nonce = 2;
Signing a Function / Deployment message online / offline
The TransactionHandler also provides a mechanism to sign the Function and Deployments messages, provided we use an Account and/or ExternalAccount
var signedTransaction = await transferHandler.SignTransactionAsync(ContractAddress, transfer);
Nethereum internally calls the Ethereum client to set the GasPrice, Nonce and estimate the Gas, so if want to sign the transaction for the contract completely offline we will need to set those values before hand.
transfer.Nonce = 2;
transfer.Gas = 21000;
transfer.GasPrice =  Nethereum.Web3.Web3.Convert.ToWei(25, UnitConversion.EthUnit.Gwei);
var signedTransaction = await transferHandler.SignTransactionAsync(ContractAddress, transfer);
Find an executable sample of the above on the Nethereum playground .
Extension methods for Functions and Deployment Messages
There are a number of extensions that can simplify the interaction with Function messages and Deployment messages.
These are under the namespace
using Nethereum.Contracts.Extensions;
Some of the extension methods are the following:
SetGasPriceFromGwei which sets the GasPrice and converts it to Wei.
CreateCallInput creates the call input which can be used to query or estimate transactions.
CreateTransactionInput creates the transaction input which can be used to send or sign the raw transaction
DecodeInput decodes the data of a transaction into a FunctionMessage
DecodeTransactionToFunctionMessage decodes the full transaction into a FunctionMessage
GetCallData returns the encoded call data with all the function and parameter information to be send to Ethereum
DecodeTransactionToDeploymentMessage decodes the full transaction into DeploymentMessage
GetSwarmAddressFromByteCode using the bytecode of a DeploymentMessage finds the swarm address included